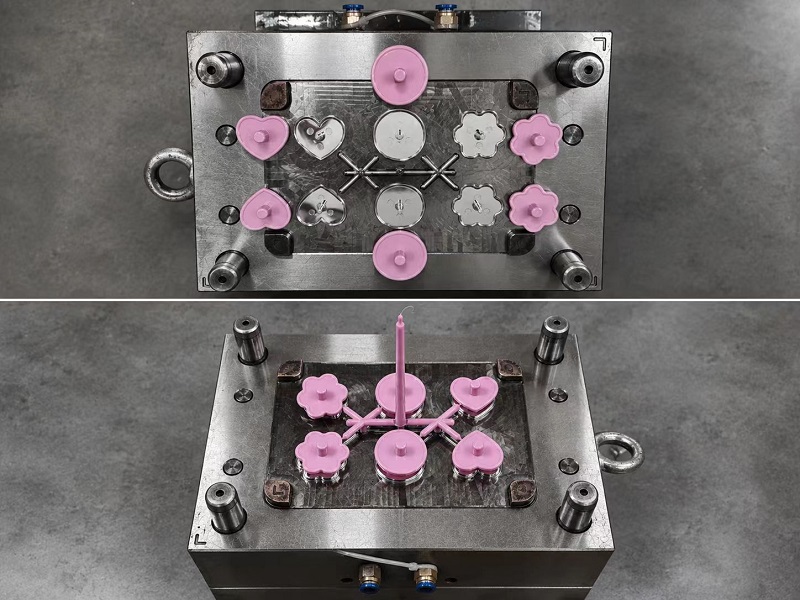

A tiny missing tip, a faint sink mark or a sharp line of flash can make a game piece unusable even when most of the part looks correct. The defect name is only the starting point. Geometry, gate location, venting, material and process settings must be reviewed together before changing the mold or molding cycle.
Quick answer
Do not correct an injection-molding defect from appearance alone. Mark its exact location, compare cavities and shots, then review the CAD, gate, runner, venting, material and process record. A process adjustment may hide a design problem, while a mold change may be unnecessary if the defect comes from unstable molding conditions.
1. Defect diagnosis table
| Defect | What it looks like | Areas to investigate | Why it matters |
|---|---|---|---|
| Short shot | A tip, thin wall or distant feature is incomplete. | Thin flow paths, hesitation, gate position, venting, material flow and fill settings. | The piece may lose detail, strength or function. |
| Flash | A thin unwanted film appears at a parting line, insert or ejector location. | Mold fit, clamping, pressure, temperature and worn shutoff surfaces. | Flash can create sharp edges and extra trimming work. |
| Sink mark | A shallow depression appears near a thick region, rib or boss. | Local thickness, packing, gate freeze, material shrinkage and cooling. | It changes the visible surface and may indicate uneven cooling. |
| Weld line | A line or color change appears where two flow fronts meet. | Holes, inserts, multiple gates, wall changes, gate location and melt-front temperature. | The line can be cosmetic or become a weak area. |
| Burn mark or air trap | A dark mark or incomplete area forms near the end of fill. | Venting, trapped air, injection speed and flow path. | It damages appearance and can weaken a small feature. |
| Warpage | The base rocks, a flat token curls or mating features move out of position. | Wall uniformity, cooling balance, shrinkage, packing and ejection. | The part may not stand, stack or assemble correctly. |
| Ejection mark or deformation | Pin marks, whitening, drag or bending appears after release. | Draft, texture, undercuts, ejector area, cooling and release force. | Small pieces can deform even when the cavity fills correctly. |
Autodesk's Moldflow molding-problems index separates defects by symptom because similar-looking problems can have different causes. The useful question is not simply "what is this defect?" but "why does it appear at this location and under these conditions?"
2. Why small game pieces are sensitive
Small pieces often combine a thick base with thin decorative features. Molten plastic may reach the base easily but hesitate in a narrow arm, blade or raised symbol. Autodesk defines a short shot as a cavity that does not fill because flow freezes before all paths are complete. Long or complex flow paths and hesitation in thin sections are listed causes.
Cosmetic surfaces create another problem. A depression that would go unnoticed inside a storage tray can be obvious on a pawn or miniature. Autodesk notes that sink marks commonly occur at thicker sections or opposite ribs, bosses and internal fillets. Color and texture also affect how visible they are.
3. Design checks before tool changes
- Look for abrupt wall-thickness changes and heavy intersections behind cosmetic faces.
- Confirm thin details have a realistic flow path from the proposed gate.
- Check draft on textured walls, deep pockets and small standing features.
- Keep weld lines away from thin load-bearing features when gate placement allows.
- Review the base for cooling balance so the finished piece stands flat.
- Give ejector pins enough area to release the part without punching or whitening it.
Weld lines form where flow paths meet, often around holes or after splitting around geometry. Autodesk's weld-line guidance recommends moving them away from strength-sensitive or highly visible areas by reviewing gate position and wall thickness. A gate change can solve one problem and create another, so the full fill pattern needs review.
Gate, parting line, ejector locations and cosmetic zones should be discussed during DFM. The CAD preparation guide for board game pieces lists the drawings and appearance notes needed before quoting.
4. How to inspect samples
A single attractive sample does not show whether the process is stable. Ask for labeled parts from each cavity and more than one molding interval. Keep cavity identity when comparing dimensions, weight, color and defects.
- Inspect under consistent lighting and use the same defect zones on every sample.
- Check thin tips, the last area to fill, weld-line locations and the gate area.
- Place standing pieces on a flat reference surface and test mating parts together.
- Record cavity number, material, color, sample date and approved process revision.
- Photograph the defect with scale and mark its exact position on the drawing.
For a family mold, compare every component produced in the same shot. One cavity may fill early while another hesitates. The guide to family molds versus separate molds explains why different shapes must share a compatible process window.
5. What to approve before production
Build a signed sample standard around function and appearance. Define which surfaces are cosmetic, which witness lines are expected and which defects are unacceptable. Avoid vague terms such as "perfect surface" because they do not tell an inspector what to measure or reject.
A temporary acceptance of a visible mark is not the same as correcting its cause. If a deviation is accepted for one batch, record the sample, quantity and approval owner so it does not silently become the new standard.
- Approved material grade, color and surface texture.
- Golden sample or signed sample set with cavity identification.
- Critical dimensions and functional tests.
- Cosmetic zones and defect acceptance rules.
- Change-control requirements for mold, material and process revisions.
6. RFQ and DFM checklist
Send the supplier STEP files, drawings, material direction, color, finish, quantity and intended use. Mark fragile details, mating surfaces and appearance-critical faces. Ask the DFM report to show the proposed gate, parting line, ejectors, draft and likely weld-line locations.
Kingke's DFM analysis and cost estimation service can review these items before mold design. For the broader production sequence, see the custom board game components manufacturing guide.
Review defect risks before cutting steel
Send the CAD files, material, quantities and cosmetic requirements for a tooling and sampling review.
Send your project details